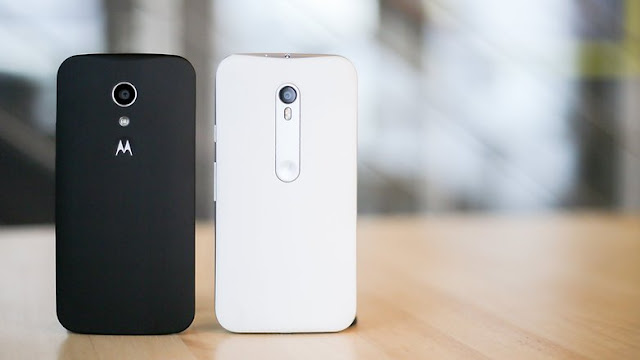
A great desire of every Android user is to have their device rooted, the Moto G 2015 is recent, but there is already a root process for it.
This post will show you how to unlock the bootloader, how to have custom recovery and how to have the famous and desired root on Moto G 1st, 2nd and 3rd Generation devices, both for lollipop 5.0 and Marshmallow 6.0!
Notices:
- Unlocking the bootloader or any process mentioned in this post may invalidate your device's warranty.
- Droid Ghost is not responsible for any damage caused to your smartphone by these processes, so do so at your own risk.
Video of the process:
How to root Motorola Moto G? Follow all the steps below
Bootloader Unlock (1st, 2nd and 3rd Generation)
Download the necessary files:
- (THIS STEP IS ONLY FOR THE 3RD GENERATION) On the Moto G 2015, go to Settings > Developer Options and select Allow OEM Unlock;
- Enter mode fastboot: desligue o Moto G; com ele desligado, pressione e mantenha pressionados os botões de Ligar e Volume para baixo;
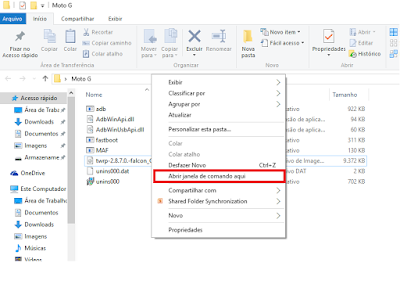
- Now on the PC, go to the folder where Minimal ADB and Fastboot were installed, go anywhere in the folder and hold shift and press the right mouse button, a menu will appear, and in it you will select “Open command window here” as in the image below:
- Now connect your Moto g to the PC;
- In the CMD Window that was opened in the Minimal ADB and Fastboot folder process, type the following command: fastboot oem get_unlock_data (Several characters will appear, copy and paste into notepad and remove the words (bootloader) and then the spaces, leaving it like this: A95130445989874#3034323659846335373300585431303633000000#977D3227D8A204CB2A524C62CBFE222017920054#894F10040F00000100000000000000000, example in the image below).
- On the website of Motorola, go to step 6 and paste the code you copied without the spaces;
- Complete all steps on the Motorola website to request the Unlock Key;
- In cmd, type: fastboot devices (it will check if the device is connected);
- Type: fastboot oem unlock yourUnlockKeyHere that Motorola sent to your email in step 8.
Done, if you followed all the steps correctly, your Moto G now has an unlocked bootloader!
Installed TWRP Recovery (Custom Recovery)
Download TWRP Recovery and save it in the Fastboot folder:
- Moto G 1st(download to see)are more recent)
- Moto G 2nd(download to see)are more recent)
- Moto G 3rd (download to see)are more recent)
- Enter fastboot mode: turn off the Moto G, with it turned off, press and hold the Power and Volume down buttons;
- Connect Moto G to PC;
- In cmd, type: fastboot flash recovery imagenamehere.img
If everything went well, the recovery has been installed!
Rooting Moto G 1st Generation
- Download the superuser on the microSD card or internal memory of your Moto G;
- Enter Recovery mode (First enter fastboot mode by turning on the device while holding down the Power and Volume down buttons, then navigate with the volume down button to the recovery option and press the volume up button to select);
- Select Install;
- Search for superuser.zip and select it;
- Pull the arrow to the right, this will install the zip;
- Do a reboot.
Fsowing the root Moto G 2nd Generation
- Turn on your Moto G 2014 in bootloader mode and connect it to your PC via USB
- Download the file 'root-titan-M-BR' and extract the files to a location
- Run the Run.bat file, and wait for the process. It will be automatic.
- Now download the file (6.0 Marshmallow) 'BETA-SuperSU-v2.62-3-20151211162651.zip'
- Now download the file (5.0 Lollipop) 'UPDATE-SuperSU-v2.46.zip'
- Copy the file to your device's internal memory, enter recovery mode and install the zip via flash.
- Then wipe cache and restart the device.
Rooting Moto G 3º Generation
- Download or movego 'BETA-SuperSU-v2.62-3-20151211162651.zip' for the microSD card or internal memory of your Moto G;
- Enter Recovery mode (First enter fastboot mode by turning on the device while holding down the Power and Volume down buttons, then navigate with the volume down button to the recovery option and press the volume up button to select);
- Select Install;
- Search for 'BETA-SuperSU-v2.62-3-20151211162651.zip' and select it;
- To avoid an infinite loop, do not drag the slidethat will appear, click on the gray button “Do not install”.and restart normally.
To check if the root was successful, download the Root Checker on the Play Store
Source: AndroidPit, Tech droid


